Today I am not going to write about food. Today I need to use this space just to write.
This summer I attended an 8-week suicide survivor support group. At the end of the group the facilitator gave each of us a little gift bag of things to help us honor and remember our loved ones as we continue to try to understand what it means to live without them. I brought it home, set it on the floor, and kind of forgot about it.
In a recent brief, but somewhat effective, cleaning spree I re-disovered the bag and opened it. Inside was one of those fridge magnets bearing an insightful quotation. Most of the time I think those things are glib and oversimplify life and the struggles contained in it. But this one made me stop and think. In fact I taped it in the middle of my bathroom mirror so that every morning and night I have to look at it and read it and think about what it means and ask myself if this is something I will accomplish and how I will do it.
"Happiness is the spiritual experience of living every minute with grace, love, and gratitude."
There is something about it that I don't quite understand and so I read it over and over and the thought that lingers is: I don't want happiness to be only a spiritual experience. I want it to be a human experience. I want it to be tangible.
My life does not feel happy right now.
There is a woman from the drop in support group that I attend who always attaches a quote to the end of her emails. One day the quote said something about how life without our loved ones is like thirst, the longer it goes on the harder it gets. It was more eloquent than that but you get the idea. Of everything I've heard and read and thought in the last 10 months that statement rings the most true. People who are lucky enough to be on the outside of this looking in seem to think that it should be getting easier. Afterall, why shouldn't it be? It's been 10 months. That ought to be enough time to get over losing the person you've known and loved for your entire life, who knew you better than anyone else in the world, who made everything "right".
There are days I feel like I am drowning. If I get one more phone call from someone trying to sell me something, or if I have to sign one more paper for the bank, or if I see one more gray haired lady in the grocery store and for a split second think it's my mom I think I will implode. There are times I wish I could just cry and yell at them and tell them how they have no idea what my life is like and what I have been through and that I am doing the best I can and would they just leave me alone?! I want them to understand that the truth is losing my mom IS like thirst. The longer she is gone the more I want her back. The more I miss her. The more I feel like this can't possibly have happened and it has to be over soon. That the healing that happens in 10 months is the equivalent of trying to use one of those little round band-aids to stop the bleeding from a gaping wound.
I am trying to live my new life with grace and love and gratitude, but right now I feel so very far away from happiness.
Monday, October 18, 2010
Tuesday, August 17, 2010
Pickles
Today I am going to tell you about pickles. And I'm going to tell you about how much I love pickles. I love them this (I am holding my arms as wide as they will go) much. I love pickles of all kinds: carrots, beets, cucumbers, cauliflower, shallots, you name it. If it has been soaked in vinegar chances are I love it. I even love the name. It's fun to say. "Pickles".

I was first introduced to vegetable pickles, other than the cucumber variety, by an ex-boyfriend who worked at a great restaurant. One bite of their housemade pickled okra and I was hooked. Then my horizons expanded even more when I moved to NY and ate a little dish of pickled vegetables at The Spotted Pig in Manhattan. They were crunchy, spicy, and had just the right amount of nose-wrinkling vinegar to set my little heart a flutter.
Then came pickled onions at the greatest holiday party I've ever attended, made (both party and pickle) by my friend Katie. If I remember right they sat atop miniature french toast topped with barbequed duck and were amazing!!!
Two summers ago in NYC I went to a fantastic market event called the New Amsterdam Market. It was a food lover's paradise with stands selling everything from wild foraged herbs and roots to basil goat cheese ice cream to little ham and pickle sandwiches.

Those little sandwiches from Marlow and Sons were quite possibly the tastiest little sandwich to ever cross my lips. They were little brioche buns slathered with sweet cream butter and topped with a shaving of ham and a little stack of bread and butter pickles. I stood in line for 20 minutes for one of those little guys and let me tell you, it was worth it. I was practically heartbroken when I found out that they didn't sell the pickles by themselves. But, with a little interregation, I learned I could buy some of the pickling spice at their shop in Williamsburg. And so a few months later when I and Katie, of pickled onion fame, found ourselves ducking into the little storefront on a drizzly winter day, all I could think of was pickles. Sure enough up on the counter were little bags of pickling spice which I hurriedly purchased lest anyone else walk through the door with visions of pickles in their head.
The sad part of this story is that the little bag of spices sat forlornly in my spice drawer, untouched, for the entire next summer. I don't know what was the matter with me. I had wanted these pickles for so long and then when there were cucumbers to make them with I never did. I do have to admit that part of the hang up was that beyond having the pickling spice, I wasn't sure how to make a pickle. Do you use all vinegar? Vinegar and water? Sugar? Salt? Both? How much spice do you put in? How long do they sit? I guess, for whatever reason, finding the answers to these questions seemed an insurmountable task.

This summer the cucumbers are back and they are even better because they are in my backyard and are growing like crazy. I've picked at least 10 over the last two weeks. As luck would have it, about the time I had 5 cucumbers piled up in my produce drawer, a post appeared on Smitten Kitchen for none other than pickles. Bread and butter pickles to be exact. To know that Deb had made them and undoubtedly made any necessary revisions to the recipe was all the motivation I needed. I followed her advice for reducing the sugar by half, doubled the amount of brine, and substituted a fairly equal amount of my beloved pickling spice mix for her spices, and lo and behold I had me some pretty tasty bread and butter pickles! Now for those brioche buns and ham . . . .

Marlow and Sons Wannabe
Bread and Butter Pickles
1 pound cucumbers, sliced 1/4-inch thick
1 medium sweet yellow onion, sliced 1/4-inch thick
1/4 c Diamond kosher salt or 2 Tbsp Morton or other kosher salt (why the difference? see here)
1 c sugar
1 c distilled white vinegar
2 Tbsp pickling spice
(mine was composed of mustard seeds, whole coriander, fennel seeds, black peppercorns, whole cloves, crushed bay leaves, and whole allspice. I don't have exact proportions since I purchased the spice but if you were trying to make your own, which I will undoubtedly be doing once I run out of this little pouch, I would work through the list above starting with mustard seeds being the spice highest in quantity and ending with whole allspice being the least. I would suggest starting with 2 Tbsp of mustard seeds and working your way incrementally down the list so you end up adding a teaspoon or so of whole allspice.)
In a medium bowl combine the cucumbers, onion, and salt. Mix well and cover the mixture with ice. Let sit at room temperature for 2 hours. In a non-reactive pot bring sugar, vinegar, and spices to a boil. Drain the cucumbers and onions. Add to the brine, stir well, and bring almost back to a boil. Remove from the heat and spoon the pickles and spices equally into 2 pint jars. Pour brine over to cover (I initially followed Deb's sugar and vinegar amounts but ended up way short of covering the pickles in the jar and made nearly another full batch to top them off. I have adjusted this recipe so you should have enough on the first try.) Let cool to room temperature, cover, and place in the fridge. You can store the pickles in an airtight container for up to three weeks in the fridge. The cucumbers will begin tasting pickled in just a couple of hours.
Don't be afraid to eat some of the pickling spice clinging to your pickle especially the mustard and fennel seeds though I might steer clear of the alspice or clove as they could be too overpowering. Also be forwarned that too many peppercorns on one little pickle sets a person's mouth on fire. I speak from experience.
Yields: 2 pint jars
Friday, August 13, 2010
I Scream, You Scream, We All Want Some Ice Cream
Last summer my ice cream machine got a work out churning out flavors like strawberry frozen yogurt, gingersnap ice cream, and concord grape sorbet. This year I've been a wee bit tardy in whipping out the old freezer bowl, but after reading Molly's popsicle post I was inspired to get back on track.
Talk to me about any frozen dessert and my interest is sparked. For a little flavor direction I pulled out the book of every ice cream lover's dreams, The Perfect Scoop by David Lebovitz, and began to peruse. I was immediately taken with his Orange Popsicle Ice Cream, a throwback to yesteryear's creamsicle. This combination of orange and cream is perhaps one of my favorites. I know it was also one of my mom's favorites which warms my heart a little knowing I have found one more way to carry her memory forward, even if it is just through eating ice cream.

I love this recipe (and a host of others in David's book) because it is yolk-less and doesn't require cooking. In most cases I prefer a french-style, custard based ice cream to a yolk-less Philadelphia style, but there are times when I want to make a cold creamy treat and don't want to mess with separating eggs and slow cooking a custard. This book is perfect for these times because there are a myriad of recipes to choose from and more importantly they are all creamy and delicious! This man has done his homework.
Due to ingredients I had on hand and personal taste I made a couple of minor substitutions to David's recipe, but the finished product is quite like I imagine he intended. One lick and you know there is no going back to those little day-glo orange creamsicles from the grocery!
Orange Popsicle Ice Cream
adapted from The Perfect Scoop by David Lebovitz
2/3 c. sugar
Grated zest of 3 oranges, preferably organic so they aren't sprayed
1 1/4 c. fresh squeezed orange juice
1 c. sour cream
( I used creme fraiche because I had a lot on hand, but next time will use the sour cream because it turned out a little too fatty with creme fraiche. I know, I wouldn't have guessed that was possible either.)
1/2 c half-and-half
2 tsp Grand Marnier, or other orange liqueur
1/4 tsp. vanilla extract
In a blender pulverize the zest and sugar until it is very fine. Add the orange juice, sour cream, half-and-half, Grand Marnier, and vanilla extract and blend until the sugar is completely dissolved.
Chill the mixture thoroughly and then freeze it in your ice cream maker or pour it into popsicle molds and freeze.
Yields about 1 quart of ice cream or 10-12 popsicles depending on the size of your molds.
Wednesday, July 28, 2010
Hand Me a Pie
I have considered not posting this until I have a foolproof, all fruit method for you but the fact is these little guys are so delicious, and it may take me eons to figure out what the problem is, that I would feel like I was holding out on you and depriving you of perhaps one of the finest summer treats of which you should partake. How was that for a run on sentence? (And to think I once planned on being an English major!)

The story of me and hand pies began last summer. I blame it on Alton Brown. Through some stroke of luck my roommate and I were the recipients of the Food Network channel though we had no subscription to cable. This being the first time in my life that I have had unrestricted access (read while neither visiting my grandparents nor in a motel while traveling) to television that is about food, all the time, I became an addict. Really it is not my fault, for what other self proclaimed foodie could resist that with the click of a button you can invite Giada or Ina or Alton into your living room to cook amazing food and throw lovely little dinner parties?
Back to the point. One evening I happened to have the Food Network on and lo and behold Alton was doing an episode about things wrapped in dough that you eat with your hands. True the focus of his show was savory hand pies such as empanadas, pasties, etc. that you could make and throw in a lunch box for a hearty meal on the go. This did not deter me however from immediately deciding I needed to pursue making one of these hand held pastries filled with fruit. Forget the hearty meal-on-the-go, I wanted a handy dessert-on-the-go!
Having found all kinds of berries at the market I decided it was time to give the hand pie a go and decided to treat my colleagues at TCR to a little 4th of July pie. Things did not go as planned. The filling was delicious. The crust was delicious. They looked really cute. But somehow when you put a dab of filling into a little round of dough, fold it over, pinch it closed and bake it what you end up with are empty fruit flavored pockets. Not quite what I was going for. My co-workers were polite and ate them and a few even thanked me for them, but I know they were really thinking "wasn't there supposed to be something in here?!".
A few weeks ago I once again found myself on the 4th of July wanting to make hand pies. This time I determined that I should make much larger rounds of dough and stuff them to the gills with fruit. Surely this would work. There's good news and there's bad news. The good news is that using larger rounds of dough was a step in the right direction. The bad news is that 7 out of 13 pies still ended up as empty fruit flavored pockets. "Why?!" you ask? If only I knew. For some reason when filled with sturdy, less juicy fruit such as apples the pies (6) turn out gloriously. When filled with a mouthwatering filling that I was oh-so-looking-forward-to such as raspberry rhubarb the pies (7) blow out their sides partway through baking and inevitably ooze all that tasty filling out onto the tray leaving you with an empty pocket and something resembling a seedy fruit roll up.

A couple of weeks ago I made the trip to Lincoln, NE to visit a couple of wonderful and amazing friends for the weekend.(On a side note, can I just say how smitten I am with the mid-west and big pink skies and farmland and little one horse towns of yesteryear right now?)

For our Friday night dinner party I was summoned to make dessert. Upon asking what kind of dessert would be most desired the answer was pie. Here it was, my chance to give this another try. "What do you think of a hand pie?" I asked. "A pie you eat with your hands?! Why, that would be divine!!" (I may be embellishing a little.)
Again I chose a firmer filling, this time making peach hand pies, and again they turned out glorious. As lovely as those were and as many compliments and commands that I become the official 'Butter Book Club' baker as I recieved, I am still vexed that I can't make my raspberry rhubarb (or for that matter I would guess any berry based filling) pies come out as anything other than something to be scraped off the tray and eaten with a fork.

So until further testing and investigation occurs, here it is. A hand pie recipe that only works with firm fruit. I know. I'm sorry. But a firm fruit hand pie is better than no hand pie at all. I speak the truth.

Firm Fruit Hand Pies
1 recipe Best Pie Dough chilled, rolled to 1/8-inch thick, and cut into rounds. I traced an upturned cereal bowl that is about 6 inches in diameter with a sharp knife for my rounds. Chill the rounds slightly before you fill them, but you want them to still be pliable.
Peach Filling:
4-5 firm-ripe peaches cut into small-ish cubes, I like to wash the fuzz off and leave the skin on
1-2 Tbsp minute tapioca
3-4 Tbsp sugar
1 tsp vanilla extract
Pinch of salt
These are approximate measurements and will vary with regard to the sweetness/juciness of your peaches, feel free to adjust accordingly. Toss peaches, sugar to taste, salt, and vanilla extract in a bowl. When you add the tapioca it should start soaking up the juices within a few minutes, so start with the smaller amount and then if it still seems too watery you can add more. What you don't want is to end up with over-starched pie filling that is gummy.
.
Apple Filling:
6 cups sliced tart baking apples, I like to leave the skin on for texture
(if your apple are big measure them in slices then cube them up so they fit into the dough rounds easier)
3/4- 1 c sugar
1/2 tsp cinnamon
1/4 tsp nutmeg
2-3 Tbsp brandy
1/2- 1 Tbsp minute Tapioca
Again these are approximate amounts. I find that I like a lightly spiced apple pie versus a pie really heavy on the cinnamon. If you like a spicier pie feel free to double the cinnamon, and add 1/4 tsp ground cloves. I have also decided that brandy is perhaps my new favorite ingredient. It is divine added to anything chocolate, apple pie, and even chicken with mushrooms! I digress. So, on that note I have upped the brandy amount in this recipe. If you don't have any on hand you could substitute part vanilla extract and part water.
I pre-cooked my apple filling on the stove to make sure the apples would be tender enough in the finished pie since a hand pie only bakes for 20 minutes or so. Mix all ingredients in a pot and cook gently over low heat until the apples are tender. Allow the mixture to cool before filling the pies.
Preheat the oven to 375 F (I might even go so far as to say 400 to really get a jump on that flaky, crispy crust, just be sure to keep an eye on them that they aren't getting too brown)
To fill a pie:
Take one round of dough. Place 2-3 Tbsp of cooled filling in the center of the dough. Using your finger wet the edge of the lower flap of dough with water. Carefully fold over the top flap of dough, being sure not to let any filling ooze out because this will prevent the dough from sealing properly and you will end up with fruit roll ups rather than pie. Gently but firmly press the seam together with your fingers and then seal again with the flour dusted tines of a fork. Place on parchment lined baking sheet. Repeat with remaining dough rounds. You can re-roll your pie dough scraps a couple of times, I found that even on the 3rd roll they were still delicious, though a little less flaky. However I personally would rather have a less flaky pie than fewer pies and a garbage can full of dough scraps. It's your call.
Now if you are patient you can put the whole tray of pies into the fridge to chill for 30 minutes or so before baking them. This will aid a flakier crust. I was not so patient and didn't chill my pies. Either way brush the top with a little egg wash (egg and water or egg and a pinch of salt whisked together) and sprinkle with some cinnamon sugar or sugar in the raw crystals. Cut a little slit in the top of each pie to allow steam to escape (I initially thought my failure to do this was the downfall on the rhubarb raspberry pies, but they didn't work any better with a slit, in fact it seemed to be just an easier escape route for the filling).
Pop into the oven on the middle rack. I found in my oven that baking one tray at a time works best. Bake for 20-25 minutes until the dough is turning golden and you begin to see bubbling juices through the slit or perhaps out of the seam of your pie. Cool slightly or to room temperature. These pies are great for breakfast too, should you have any left over and wonder what to do with them(!).
Yields 8-10 pies
The filling recipes yield more than you will need for the pies, but they are delicious cooked stovetop and served over ice cream or pancakes or what have you.

The story of me and hand pies began last summer. I blame it on Alton Brown. Through some stroke of luck my roommate and I were the recipients of the Food Network channel though we had no subscription to cable. This being the first time in my life that I have had unrestricted access (read while neither visiting my grandparents nor in a motel while traveling) to television that is about food, all the time, I became an addict. Really it is not my fault, for what other self proclaimed foodie could resist that with the click of a button you can invite Giada or Ina or Alton into your living room to cook amazing food and throw lovely little dinner parties?
Back to the point. One evening I happened to have the Food Network on and lo and behold Alton was doing an episode about things wrapped in dough that you eat with your hands. True the focus of his show was savory hand pies such as empanadas, pasties, etc. that you could make and throw in a lunch box for a hearty meal on the go. This did not deter me however from immediately deciding I needed to pursue making one of these hand held pastries filled with fruit. Forget the hearty meal-on-the-go, I wanted a handy dessert-on-the-go!
Having found all kinds of berries at the market I decided it was time to give the hand pie a go and decided to treat my colleagues at TCR to a little 4th of July pie. Things did not go as planned. The filling was delicious. The crust was delicious. They looked really cute. But somehow when you put a dab of filling into a little round of dough, fold it over, pinch it closed and bake it what you end up with are empty fruit flavored pockets. Not quite what I was going for. My co-workers were polite and ate them and a few even thanked me for them, but I know they were really thinking "wasn't there supposed to be something in here?!".
A few weeks ago I once again found myself on the 4th of July wanting to make hand pies. This time I determined that I should make much larger rounds of dough and stuff them to the gills with fruit. Surely this would work. There's good news and there's bad news. The good news is that using larger rounds of dough was a step in the right direction. The bad news is that 7 out of 13 pies still ended up as empty fruit flavored pockets. "Why?!" you ask? If only I knew. For some reason when filled with sturdy, less juicy fruit such as apples the pies (6) turn out gloriously. When filled with a mouthwatering filling that I was oh-so-looking-forward-to such as raspberry rhubarb the pies (7) blow out their sides partway through baking and inevitably ooze all that tasty filling out onto the tray leaving you with an empty pocket and something resembling a seedy fruit roll up.

A couple of weeks ago I made the trip to Lincoln, NE to visit a couple of wonderful and amazing friends for the weekend.(On a side note, can I just say how smitten I am with the mid-west and big pink skies and farmland and little one horse towns of yesteryear right now?)

 |
| This is the ORIGINAL(!) Pony Express Station in a little town in NE! |
For our Friday night dinner party I was summoned to make dessert. Upon asking what kind of dessert would be most desired the answer was pie. Here it was, my chance to give this another try. "What do you think of a hand pie?" I asked. "A pie you eat with your hands?! Why, that would be divine!!" (I may be embellishing a little.)
Again I chose a firmer filling, this time making peach hand pies, and again they turned out glorious. As lovely as those were and as many compliments and commands that I become the official 'Butter Book Club' baker as I recieved, I am still vexed that I can't make my raspberry rhubarb (or for that matter I would guess any berry based filling) pies come out as anything other than something to be scraped off the tray and eaten with a fork.

So until further testing and investigation occurs, here it is. A hand pie recipe that only works with firm fruit. I know. I'm sorry. But a firm fruit hand pie is better than no hand pie at all. I speak the truth.

1 recipe Best Pie Dough chilled, rolled to 1/8-inch thick, and cut into rounds. I traced an upturned cereal bowl that is about 6 inches in diameter with a sharp knife for my rounds. Chill the rounds slightly before you fill them, but you want them to still be pliable.
Peach Filling:
4-5 firm-ripe peaches cut into small-ish cubes, I like to wash the fuzz off and leave the skin on
1-2 Tbsp minute tapioca
3-4 Tbsp sugar
1 tsp vanilla extract
Pinch of salt
These are approximate measurements and will vary with regard to the sweetness/juciness of your peaches, feel free to adjust accordingly. Toss peaches, sugar to taste, salt, and vanilla extract in a bowl. When you add the tapioca it should start soaking up the juices within a few minutes, so start with the smaller amount and then if it still seems too watery you can add more. What you don't want is to end up with over-starched pie filling that is gummy.
.
Apple Filling:
6 cups sliced tart baking apples, I like to leave the skin on for texture
(if your apple are big measure them in slices then cube them up so they fit into the dough rounds easier)
3/4- 1 c sugar
1/2 tsp cinnamon
1/4 tsp nutmeg
2-3 Tbsp brandy
1/2- 1 Tbsp minute Tapioca
Again these are approximate amounts. I find that I like a lightly spiced apple pie versus a pie really heavy on the cinnamon. If you like a spicier pie feel free to double the cinnamon, and add 1/4 tsp ground cloves. I have also decided that brandy is perhaps my new favorite ingredient. It is divine added to anything chocolate, apple pie, and even chicken with mushrooms! I digress. So, on that note I have upped the brandy amount in this recipe. If you don't have any on hand you could substitute part vanilla extract and part water.
I pre-cooked my apple filling on the stove to make sure the apples would be tender enough in the finished pie since a hand pie only bakes for 20 minutes or so. Mix all ingredients in a pot and cook gently over low heat until the apples are tender. Allow the mixture to cool before filling the pies.
Preheat the oven to 375 F (I might even go so far as to say 400 to really get a jump on that flaky, crispy crust, just be sure to keep an eye on them that they aren't getting too brown)
To fill a pie:
Take one round of dough. Place 2-3 Tbsp of cooled filling in the center of the dough. Using your finger wet the edge of the lower flap of dough with water. Carefully fold over the top flap of dough, being sure not to let any filling ooze out because this will prevent the dough from sealing properly and you will end up with fruit roll ups rather than pie. Gently but firmly press the seam together with your fingers and then seal again with the flour dusted tines of a fork. Place on parchment lined baking sheet. Repeat with remaining dough rounds. You can re-roll your pie dough scraps a couple of times, I found that even on the 3rd roll they were still delicious, though a little less flaky. However I personally would rather have a less flaky pie than fewer pies and a garbage can full of dough scraps. It's your call.
Now if you are patient you can put the whole tray of pies into the fridge to chill for 30 minutes or so before baking them. This will aid a flakier crust. I was not so patient and didn't chill my pies. Either way brush the top with a little egg wash (egg and water or egg and a pinch of salt whisked together) and sprinkle with some cinnamon sugar or sugar in the raw crystals. Cut a little slit in the top of each pie to allow steam to escape (I initially thought my failure to do this was the downfall on the rhubarb raspberry pies, but they didn't work any better with a slit, in fact it seemed to be just an easier escape route for the filling).
Pop into the oven on the middle rack. I found in my oven that baking one tray at a time works best. Bake for 20-25 minutes until the dough is turning golden and you begin to see bubbling juices through the slit or perhaps out of the seam of your pie. Cool slightly or to room temperature. These pies are great for breakfast too, should you have any left over and wonder what to do with them(!).
Yields 8-10 pies
The filling recipes yield more than you will need for the pies, but they are delicious cooked stovetop and served over ice cream or pancakes or what have you.
Friday, July 2, 2010
Be Bop a Re Bop Rhubarb Tart
I suppose I'm a bit tardy in posting this, as for most of the country rhubarb season was over eons ago. However, if you are clever you will have stashed away chunks of those jewel-like stalks in your freezer to whip out whenever you please and this recipe will still be of use to you.

It has come to my attention that I must be growing up. There are lots of of things that lead me to believe this - rapidly approaching 30, starting a business, finding grey hairs on my head, but perhaps one of the most telling events is my growing fondness for things I disdained in my youth. Last summer's obsession with plums may have been the advent of this newfound maturity. Then came my conversion to parsley use. Next up was prunes. And now rhubarb. You get the idea.


Truth be told rhubarb began to woo me last July when I bravely turned it into a one vegetable (yes, it's really a vegetable, just like tomatoes are really a fruit!) crisp with no supporting cast such as a strawberry to be seen. But this, this is the year of true rhubarb love. It made it's debut atop the best pancakes ever , has been gently stewed with (albeit frozen) strawberries then spooned atop vanilla cake garnished with a bit of creme fraiche. It has accompanied creamy panna cotta on it's journey to my stomach and most recently made it's way into this tart. Rhubarb is so wonderful in fact that this man sings a song about it on his radio show.

I am also a sucker for anything with nuts. Especially if those nuts are ground up and mixed into a batter with things like butter! and sugar! and eggs! oh my!!
This tart is one of my favorites because unlike a standard custard-based fruit tart you can make this any time of year with whatever fruit you happen to have on hand, frozen or fresh. To boot the only work involved is making and rolling out the tart dough but I have been known to simply pat it into a tart shell (this works especially well for tartlets) and leave the rolling pin in the drawer. It seems to me that almonds and rhubarb pair especially well, however this tart would be just as tasty with raspberries, sour cherries, plums, apricots, pretty much anything you can get your hands on.

Rhubarb Frangipane Tart
A compilation of recipes from two of my favorite books: Crust from Suzanne Goin's Sunday Suppers at Lucques and Filling from the Tartine Bakery Cookbook
Crust (Pate Sucree): Yields dough for 2 10-inch crusts
I like this recipe because you can make the dough and immediately line your shell. Most recipes call for chilling the dough for at least an hour. Let's just admit it, there are days we just don't have the patience for that.
1/4 c heavy cream
2 extra-large egg yolks
2 3/4 c plus 2 Tbsp all purpose flour
1/4 c plus 3Tbsp sugar
1/4 tsp kosher salt
2 sticks (8oz) unsalted butter
Whisk the cream and egg yolks together in a small bowl.
In a stand mixer fitted with the dough hook, combine the flour, sugar, salt, and butter on medium speed until you have a coarse meal. Gradually add the cream and yolks, and mix just until combined. Do not overwork the dough.. Transfer the dough to a large work surface and bring it together with your hands to incorporate completely (use the heel of your hand to smear the dough on the counter as you push it away from your body, this is called fraisage). Divide the dough in half , shape into 1" thick discs, and wrap one of them to freeze and use later.
If the dough is too soft, put in the refrigerator for 5-10 minutes to firm up a little. If the dough is manageable, place it on a lightly floured work surface, sprinkle a little flour over the dough, and roll it out into a 1/4-inch thick circle, flouring as necessary. Starting at one side, roll and wrap the dough around the rolling pin to pick it up. Unroll the dough over a 10-inch tart pan. Gently fit the dough loosely into the pan, lifting the edges and pressing the dough into the corners with your fingers. To remove the excess dough, roll the rolling pin lightly over the top of the tart pan for a nice clean edge, or work your way around the edge, pinching off any excess dough with your fingers. Chill for 1 hour (or if your name is Amy, throw it into the freezer until it is firm, 10-15 minutes).
Filling (Frangipane Cream): Yields 3 cups
2 c (7 oz) sliced almonds
1 c (7oz) sugar
3/4 c plus 2Tbsp (7 oz) unsalted butter at room temperature
pinch kosher salt
1Tbsp plus 1 tsp brandy
2 large eggs
2 Tbsp whole milk
1 1/2-2 c rhubarb or other fruit
In a food processor, combine the almonds with 1/4 c of the sugar and process until finely ground. Set aside.
In the bowl of a stand mixer fitted with the paddle attachment, beat the butter on medium speed until creamy. Add the remaining 3/4 c sugar and mix to incorporate. Add the almond-sugar mixture and beat until thoroughly combined. Add the salt, brandy, and 1 egg and mix until incorporated. Add the remaining egg and the milk and mix until light and fluffy.
This cream will keep in an airtight container in the refrigerator for up to one week.
To assemble the tart:
Preheat the oven to 375 F.
Fill the tart shell with 3 cups of frangipane cream (I only had a 9-inch tart pan so I used 2 1/2 cups of filling and it was plenty). Smooth the top with a rubber spatula. Arrange the fruit on top. Place the tart on a baking sheet. Bake the tart until the crust is golden brown and the filling is set, about 1 hour and 20 minutes (if your filling is browning too fast loosely cover the tart with foil. You want the crust to be fully cooked so don't skimp on the full bake time). The filling should feel firm and slightly springy to the touch and the fruit should be tender. Transfer to a wire rack and let cool. This tart is best served warm or at room temperature. It will keep in the refrigerator for up to 3 days, however it is so delicious I'd be willing to bet it won't make it that long!
Yields 8-10 servings

It has come to my attention that I must be growing up. There are lots of of things that lead me to believe this - rapidly approaching 30, starting a business, finding grey hairs on my head, but perhaps one of the most telling events is my growing fondness for things I disdained in my youth. Last summer's obsession with plums may have been the advent of this newfound maturity. Then came my conversion to parsley use. Next up was prunes. And now rhubarb. You get the idea.

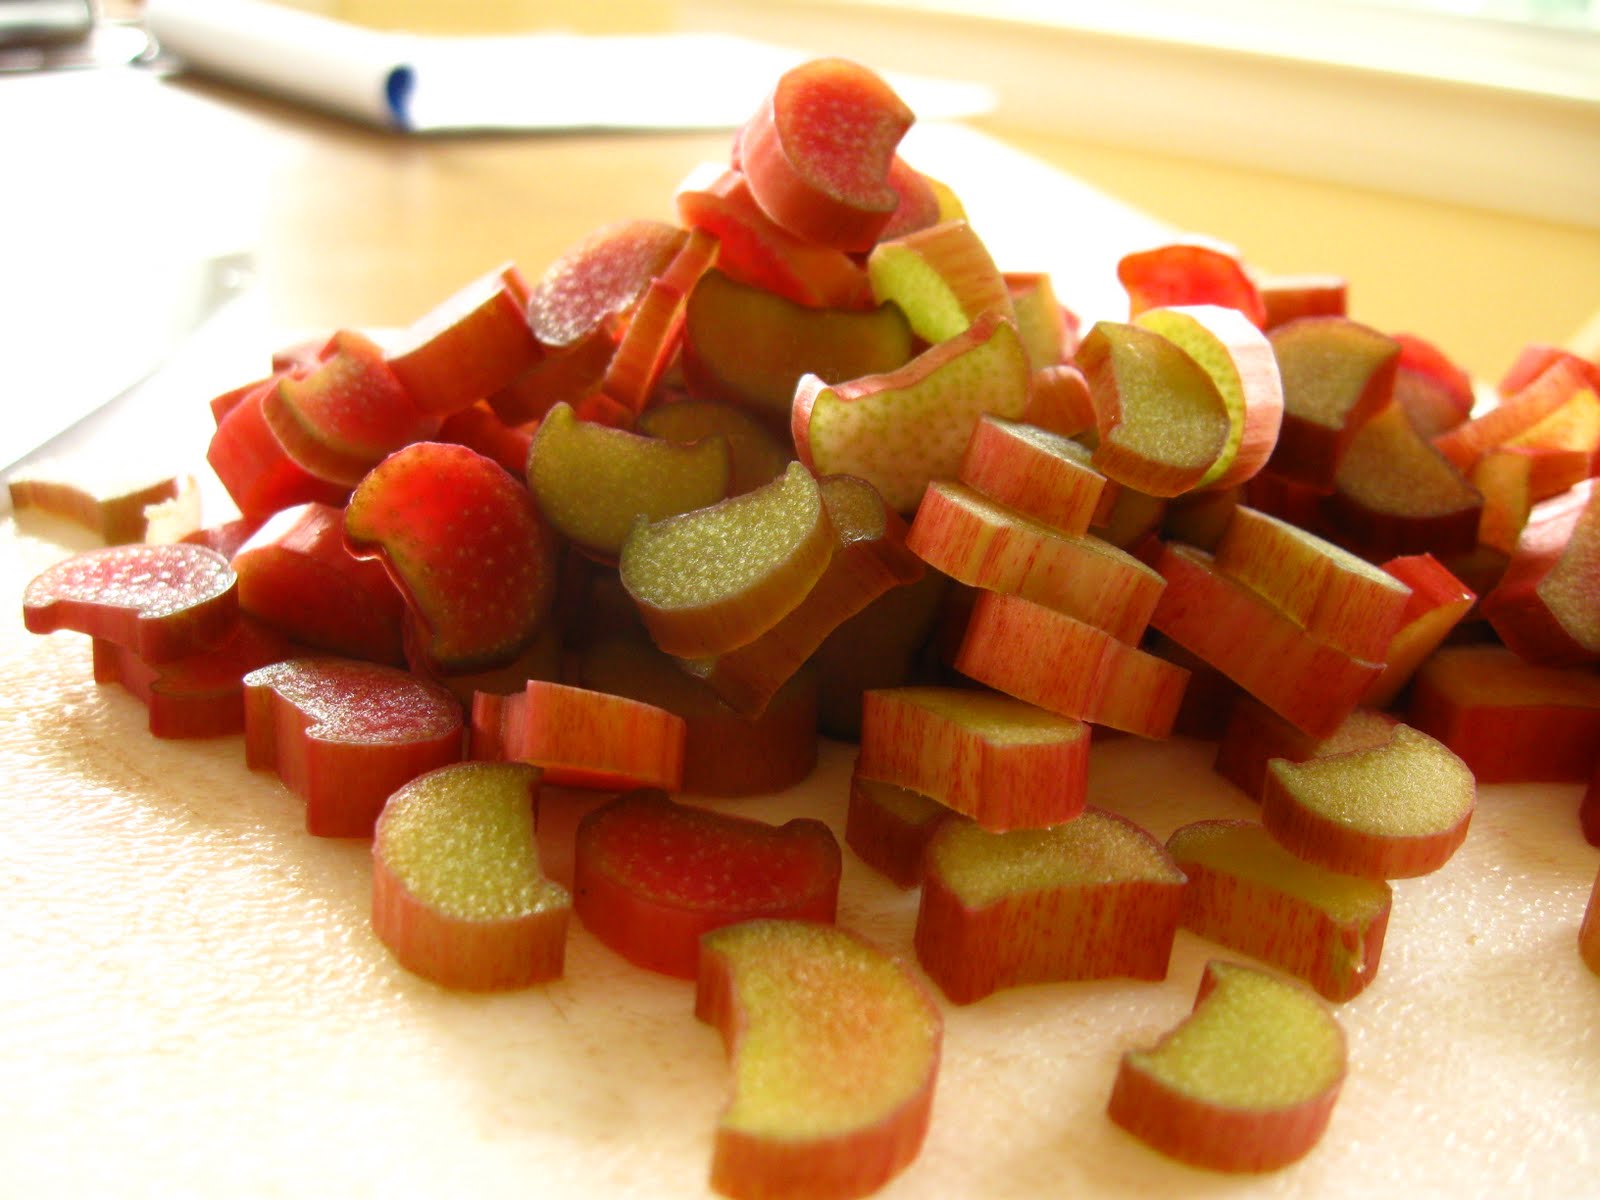
Truth be told rhubarb began to woo me last July when I bravely turned it into a one vegetable (yes, it's really a vegetable, just like tomatoes are really a fruit!) crisp with no supporting cast such as a strawberry to be seen. But this, this is the year of true rhubarb love. It made it's debut atop the best pancakes ever , has been gently stewed with (albeit frozen) strawberries then spooned atop vanilla cake garnished with a bit of creme fraiche. It has accompanied creamy panna cotta on it's journey to my stomach and most recently made it's way into this tart. Rhubarb is so wonderful in fact that this man sings a song about it on his radio show.

I am also a sucker for anything with nuts. Especially if those nuts are ground up and mixed into a batter with things like butter! and sugar! and eggs! oh my!!
This tart is one of my favorites because unlike a standard custard-based fruit tart you can make this any time of year with whatever fruit you happen to have on hand, frozen or fresh. To boot the only work involved is making and rolling out the tart dough but I have been known to simply pat it into a tart shell (this works especially well for tartlets) and leave the rolling pin in the drawer. It seems to me that almonds and rhubarb pair especially well, however this tart would be just as tasty with raspberries, sour cherries, plums, apricots, pretty much anything you can get your hands on.

Rhubarb Frangipane Tart
A compilation of recipes from two of my favorite books: Crust from Suzanne Goin's Sunday Suppers at Lucques and Filling from the Tartine Bakery Cookbook
Crust (Pate Sucree): Yields dough for 2 10-inch crusts
I like this recipe because you can make the dough and immediately line your shell. Most recipes call for chilling the dough for at least an hour. Let's just admit it, there are days we just don't have the patience for that.
1/4 c heavy cream
2 extra-large egg yolks
2 3/4 c plus 2 Tbsp all purpose flour
1/4 c plus 3Tbsp sugar
1/4 tsp kosher salt
2 sticks (8oz) unsalted butter
Whisk the cream and egg yolks together in a small bowl.
In a stand mixer fitted with the dough hook, combine the flour, sugar, salt, and butter on medium speed until you have a coarse meal. Gradually add the cream and yolks, and mix just until combined. Do not overwork the dough.. Transfer the dough to a large work surface and bring it together with your hands to incorporate completely (use the heel of your hand to smear the dough on the counter as you push it away from your body, this is called fraisage). Divide the dough in half , shape into 1" thick discs, and wrap one of them to freeze and use later.
If the dough is too soft, put in the refrigerator for 5-10 minutes to firm up a little. If the dough is manageable, place it on a lightly floured work surface, sprinkle a little flour over the dough, and roll it out into a 1/4-inch thick circle, flouring as necessary. Starting at one side, roll and wrap the dough around the rolling pin to pick it up. Unroll the dough over a 10-inch tart pan. Gently fit the dough loosely into the pan, lifting the edges and pressing the dough into the corners with your fingers. To remove the excess dough, roll the rolling pin lightly over the top of the tart pan for a nice clean edge, or work your way around the edge, pinching off any excess dough with your fingers. Chill for 1 hour (or if your name is Amy, throw it into the freezer until it is firm, 10-15 minutes).
Filling (Frangipane Cream): Yields 3 cups
2 c (7 oz) sliced almonds
1 c (7oz) sugar
3/4 c plus 2Tbsp (7 oz) unsalted butter at room temperature
pinch kosher salt
1Tbsp plus 1 tsp brandy
2 large eggs
2 Tbsp whole milk
1 1/2-2 c rhubarb or other fruit
In a food processor, combine the almonds with 1/4 c of the sugar and process until finely ground. Set aside.
In the bowl of a stand mixer fitted with the paddle attachment, beat the butter on medium speed until creamy. Add the remaining 3/4 c sugar and mix to incorporate. Add the almond-sugar mixture and beat until thoroughly combined. Add the salt, brandy, and 1 egg and mix until incorporated. Add the remaining egg and the milk and mix until light and fluffy.
This cream will keep in an airtight container in the refrigerator for up to one week.
To assemble the tart:
Preheat the oven to 375 F.
Fill the tart shell with 3 cups of frangipane cream (I only had a 9-inch tart pan so I used 2 1/2 cups of filling and it was plenty). Smooth the top with a rubber spatula. Arrange the fruit on top. Place the tart on a baking sheet. Bake the tart until the crust is golden brown and the filling is set, about 1 hour and 20 minutes (if your filling is browning too fast loosely cover the tart with foil. You want the crust to be fully cooked so don't skimp on the full bake time). The filling should feel firm and slightly springy to the touch and the fruit should be tender. Transfer to a wire rack and let cool. This tart is best served warm or at room temperature. It will keep in the refrigerator for up to 3 days, however it is so delicious I'd be willing to bet it won't make it that long!
Yields 8-10 servings
Saturday, June 19, 2010
Carrot Stick Salad
I often make the mistake of cooking something in a rush because I am so hungry or because if I don't get a move on it will be 10:00 before we eat dinner that I forget to record it in case it should turn out well enough to share with you. This is one of those things.

When I was a kid my mom would let my brother and I "cook". We were the proud owners of The Kid's Cookbook, I think it was called, and we would drag it out and pore over the pages agonizing over what to make. Our specialties were ants on a log and carrot coins. It's quite possible that the first thing I learned to "cook" was carrots. And by "cook" I mean setting a cutting board on the floor, carefully cutting the carrots into coins with a dull knife, sticking a toothpick in each one, and arranging them on a plate. I was born to be in the kitchen! Fortunately my skills have advanced a bit since those early years but I can still appreciate the charm of a simple dish.
As luck would have it while all those people who live on either coast are gorging themselves on local cherries and strawberries and peas and avocadoes I am still waiting for my garden to produce something other than an unruly patch of arugula and one pea pod. So when it came to what to make into a salad to go with dinner my best option was a bag of carrots (from one of the coasts, of course) that have been patiently waiting in the fridge for their moment of glory.
One other thing that is growing like a weed in my garden is a mint plant. It is threatening to take over all the bell pepper territory so in an effort to aid their growth (with the hope that maybe by October(?!) the plants will be big enough to produce a pepper) I lopped off a sprig and it became part of my salad plan. Eight leaves down, about a million to go!
This salad is so simple I almost feel guilty calling it so, but it is one of those perfect summer dishes - quick, cool, crisp, and tasty!
Carrot Stick Salad with Red Wine Vinegar and Mint
4 medium carrots
1/2 a small shallot thinly sliced
6-8 mint leaves, rolled up and sliced into ribbons
a splash of red wine vinegar
a drizzle of honey
a pinch of kosher salt
Slice the carrots into long strips and then cut those strips into matchsticks. Toss all ingredients in a bowl and season to taste. The acidity of the vinegar should be balanced with a bit of sweetness from the honey and just a pinch of salt to take the edge off.
Serves 2 as a side dish
Sunday, June 6, 2010
When Life Hands You Lemons

There is a saying that goes something like, "When life hands you lemons, make lemonade". Here is a saying I like better. "When it is a warm, sunny Saturday afternoon, make lemonade." Sure it's not quite as catchy, but it's a lot more practical.

Remember the day when you could drop by a neighbor's house and they'd invite you in for a frosty glass of lemonade? No? Me neither. But I've read about it in books and it sounds lovely. I often wish those were the times in which we lived; it seemed there wasn't a worry that a seat on the porch swing and a glass of lemonade couldn't soothe. While my story doesn't quite hearken back to yesteryear it is a good one.

Last week my friend invited us over for a delicious lunch accompanied by some very tasty limeade; it was during that lunch that I learned a little secret which (I hope she won't mind) I'm now going to share with you.
Zest. Yep. That's it. One word that will change your life, or at least your lemonade. It takes the lemon flavor to a whole new level, packing a punch one cannot achieve with juice alone.

I'm going to play my food snob card here and say that in my opinion lemonade made from a can is not real lemonade. Worse yet is the powdered stuff that used to lurk in my grandmother's cupboard. Sure they can be handy in a pinch, say for instance a large group of dehydrated people happen to come to your house and all you've got is a tray of ice, a faucet, and a minute to spare. Barring those circumstances it is not okay to serve lemonade that didn't come out of a lemon. Period. Ok, I'll get off my soapbox now.
Feel free to tinker with this recipe as you see fit. It would be delicious with limes or a combination of lemons and limes and even tastier if you were, say, to mash around a few mint leaves in your glass before you added your lemon or limeade. Mmm, I think I better go pour another glass!

Zest-y Lemonade
Zest of 1 lemon (I like to use a Microplane, it produces very fine zest)
1 c. lemon juice
1/2-3/4 c. sugar
4 c. water
1 c. ice cubes, plus more for serving
Zest one lemon and place the zest in a pitcher. If you use a box grater to zest your fruit be sure to only get the yellow part and avoid the white pith. Mince the zest very fine so you don't have to chew your lemonade.
Juice 6-8 lemons to yield 1 cup of juice. Pour into pitcher with zest, add sugar to taste, and top with water. Stir vigorously to dissolve the sugar. Add 1 cup ice cubes to chill. Pour into ice filled glasses, find a porch to sit on, and enjoy!
Wednesday, June 2, 2010
Get Out Your Griddle!

Pancakes and I go way back. We've known each other since my parents had shag carpet and I had no front teeth. We've been on camping trips and boat excursions together. Over the years we have occasionally met over a restaurant table, but it is fair to say we became best acquainted during the years of my family's ritual Friday night pancake dinners. Yes. We ate pancakes. For dinner. On Friday. Every week. It was wonderful.

How the tradition came about I don't know. What I do know is that pancakes, when done right, are divine. I have eaten and made my share of pancakes in this life. There were buckwheat cakes and wholewheat cakes, cakes flecked with orange zest and cakes dotted with blueberries. There were cakes fortified with wheatgerm and flax and cakes studded with cinnamon scented pears. But the pancake to go down in history was laden with little golden nuggets of granola, offering up at once a sweet, delicious, yet hearty, stick-to-your-ribs breakfast. It was after that life-altering granola pancake experience that I began to ponder further pancake possibilities.

Fastforward to a couple of months ago when I happened to see two fellow bloggers adding pancakes to their repertoires, both of which involved oatmeal. Since I don't live anywhere near here or here or here it was clear that in order to get my pancake fix I needed to take matters into my own hands. It occured to me that a pancake made with oats had the potential to mimick the granola pancake of glory. True it would not be the same, and would best be considered a second cousin once removed, but it just might do the trick.


This pancake is second to none. It is at once fluffy and filling. It is substantial but won't make you leave the table feeling like you just ate a brick. It is best served draped in warm fruit compote, or if you are a purist, with a splash of pure maple syrup.
The only drawback to this pancake is that you need to know the night before that you want to eat it in the morning (or if you happen to have a p.m. pancake ritual you'll need to prepare accordingly the morning of). But, I assure you that once these bad boys have ventured off the griddle, onto your plate, and subsequently into your mouth there is not a single drawback that will keep you from eating them time and again! They have become my one and only pancake pursuit and have accompanied me from Mexico to South Dakota and pretty much everywhere in between that happens to have a kitchen stocked with a skillet and a spatula.
Oatmeal Pancakes
adapted from Orangette
I had been making these pancakes just as the recipe on Orangette states until the most recent batch; it was late at night and my oats were in the bowl waiting for their buttermilk bath when (gasp!) I realized I had only half the amount of buttermilk necessary. This has NEVER happened to me before! I always err on the side of having too much buttermilk standing around in the fridge twiddling it's thumbs just waiting to mold. A quick mental jog led me to think that perhaps a mixture of yogurt and milk might have the same effect as buttermilk. The next morning as I ate the thickest, most light and fluffy oatmeal pancakes ever I don't think I could have been happier to run out of an ingredient!
2 c. Rolled Oats
1 c. Milk
1 c. Plain Yogurt
1/2 c. All Purpose Flour
2 Tbsp. Sugar
1 tsp. Baking Powder
1 tsp. Baking Soda
1/2 tsp. Salt
2 Large Eggs
1/2 Stick Butter (4 Tbsp), melted and cooled
In a large bowl mix together the oats, milk, and yogurt. Stir well to make sure all the oats are moistened. Cover bowl with plastic wrap and place in the fridge the night before (or approximately 10-12 hours before you want to eat your pancakes).
In a medium bowl whisk together the flour, sugar, baking powder, baking soda, and salt. When you are ready to begin cooking the pancakes stir the eggs into the oat mixture, mixing well. Next stir in the dry ingredients, followed by the melted butter. Mix well.
Scoop approximately 1/3 c. batter onto a lightly greased, preheated (med-low works well on my stove) griddle. Gently flip when bubbles appear on the top and the edges are just beginning to set. Griddle till golden brown and firm to the touch. Serve immediately or, if you are making a large batch, which I often do (this recipe doubles perfectly), preheat the oven to 190 or 200 F and place a casserole dish inside. As you take the pancakes from the griddle place them in the casserole, covered loosely with foil. You lose a little bit of that crunchy crust but you get to sit down and eat with your fellow dining companions without having to hop up every 3 minutes to turn pancakes; well worth the crust sacrifice if you ask me!
Serves 2-3
Thursday, May 20, 2010
Think of it as a Miniature Cake
I have a confession to make. I don't like cupcakes(!). I also don't like muffins, but let's save that for another post.

Considering they are both baked in the same tin, one could assume my dislike centers around their shape or size. One would be wrong. I'm all for baking and eating convenient hand-held pastries. What I'm NOT for is convenient hand-held pastries that are dry, stale, or worse too sweet. Herein lies the problem. Nearly every cupcake I have ever consumed has fallen into one or more of those categories.
In the 90's there was a popular TV show about 4 thirty-something women living, loving, dating, and breaking-up in perhaps the greatest city in the world (I'm not at all biased). One of their hangouts was this bakery. Which is now famous for it's cupcakes. Which are not very good. They filmed one scene with the main character eating a cupcake and years later the whole country is still feeling the affects of the craze started in that little Greenwich Village hotspot.

Why am I writing a post about cupcakes if I don't like them, you ask? That is a fine question. In fact I asked it of myself just before sitting down to type this. Here is the answer: It just so happens that a friend of mine had a birthday party last week. When invited to this birthday party I immediately began to scour my brain, cookbooks, and fellow blogsites for "just the thing" to make. First it was going to be a fantastic 3 layer Tres Leches cake. Ooh! how about miniature Hazelnut Panna Cotta with Blackberry Compote. No, definitely Key Lime Bars. Brownies. Biscotti? . . . you get the idea. In the end what it boiled down to was logisitics. This birthday was a joint party for my friend and his housemate which meant lots of people, lots of beer, and not a lot of places to sit with a proper piece of cake on a plate and eat it. This was just the situation for a convenient hand-held pastry.

I'd like to be able to tell you that the cupcakes I took to his party were the best cupcakes ever. They were not. They were little morsels that disintegrated into a pile of crumbs the instant you peeled the wrapper off. They were so wimpy that you basically had to use the blob of chocolate frosting inevitably stuck on your fingers to mash around on the paper and retrieve as many crumbs as possible before jamming the whole mess in your mouth. Not a pretty site. This is not what to take to a birthday party for a friend who is also a baker!

Such things happen when a girl gets all her pastry recipes from either coast and winds up in the middle of the country 5,000 feet above sea level. Surely I'm not the first to tell you this: things do not bake the same here. Sure there are some tips and tricks to high altitude baking, but the real trick is that there is no golden rule. Each type of baked good and/or recipe requires slightly different tweaking, making me a very frustrated little baker with a lot of sorry looking pastries coming out of my kitchen.
I am determined not to give up. The dream of my bakery has become good motivation to stick with a recipe and keep tweaking and testing until I get it just right. This time I was lucky enough to get it figured out on the second try. As I sit here typing there are just shy of 3 dozen mini cupcakes basking in the glow of perfection mere inches from my computer. Ahhh, the sweet smell (and taste) of success.

Vanilla Cupcakes with Chocolate Frosting
This recipe yields batter for one 9-inch single-layer cake OR about 4 dozen mini cupcakes (I'm not sure how many full sized cupcakes it would make, clearly I didn't do due diligence with this recipe!).
I apologize that this recipe is in weight rather than volume measurement, I forget that not everyone has a kitchen scale kicking around in the cupboards. I will do my homework over the next few days and try to get some volume measurements posted on here.
2 large eggs
1 tsp. vanilla extract
3 oz unsalted butter, room temperature
8 oz sugar
6 oz cake flour
1/2 tsp. baking soda (if you live at sea level, double this amount)
pinch of salt
4 oz full fat sour cream
1/2 c whole milk
Preheat oven to 325 F. Place a rack in the upper-middle portion of your oven.
In the bowl of an electric mixer combine butter and sugar. Using a paddle attachment cream on medium speed for 5 minutes. Add vanilla extract and eggs one at a time, mixing until incorporated. Stop and scrape your bowl well. Beat on high for 1 minute. Sift together cake flour, baking soda, and salt. Add flour mixture in thirds, alternating with the sour cream (in two batches), so that you begin and end with flour. Slowly pour in the milk while mixing on low speed. The batter will be runny and somewhat separated. Wait for it to begin to come together then stop and scrape the bowl thoroughly. Mix on low speed for one more minute.
If using a cake pan, grease it and place a circle of parchement paper on the bottom and grease that as well. If you are using muffin tins line them with paper liners. Fill each tin 2/3 full.
For mini cupcakes bake 12-15 minutes, turning about 3/4 of the way through. The bake time for full size cupcakes will be longer, probably 20-25 minutes and a cake may take 30-40 minutes. The best way to know if your cupcakes or cake is done is to gently press the top with your finger. The batter should be firm yet springy. If the spot you pressed holds an indentation the cake needs a few more minutes in the oven. You can also test with a toothpick or skewer, it should come out clean.
Chocolate Frosting
One of the best, and easiest frostings to make is chocolate ganache. You can be patient and let it sit and firm up at room temperature overnight, or place it in the fridge for a bit to speed things along. You can also chill it just slightly in the fridge and then whip it with a mixer until you get a light fluffy mousse-like frosting. You can also flavor it a number of ways if you like by steeping orange peel or coffee beans, etc. in the hot cream before adding it to the chocolate. The possibilities are nearly endless.
You may have some ganache left over; it is delicious straight from the fridge on a spoon or add a couple spoonfuls to a cup of hot milk for hot chocolate, or melt it and use it as a chocolate fondue for fresh fruit.
8 oz bittersweet chocolate (60% or higher)
8 oz heavy cream
flavor of choice (optional)
If your chocolate came in a large piece chop it into pieces no larger than a quarter. Place chocolate in a medium heatproof bowl.
In a small saucepan heat heavy cream and flavor ingredient (if using) just to a boil. Keep an eye on it; cream can boil over in an instant and it's a mess you don't want to clean up! If you are using a flavor, turn off the heat and let the cream and flavor ingredient sit for 10-30 minutes, this is called steeping. Vary the time based on how intensely flavored you want your frosting.
If you steeped your cream, reheat it just to a boil. Slowly pour the hot cream through a strainer over your bowl of chocolate. Allow the chocolate and cream to sit for a few minutes so that the chocolate can soften. Gently whisk the chocolate and cream together, using small concentric circles. Mix until smooth.
Place a piece of plastic wrap right on the surface of the ganache and leave out at room temperature overnight or place in the fridge for a while, stirring from time to time as it thickens. Be sure not to let it get too hard around the edges between stirring or you will end up with chunks in your frosting and it will be hard to pipe.
When frosting is a spreadable consistency spoon it into a piping bag fitted with a large star-tip and frost each cupcake with a gentle swirl motion, letting pressure off the bag as the tip comes around to where you started; this will stop the flow of frosting and make a nice little point.
Monday, May 17, 2010
Big Plans

Dear friends, over the past few weeks I have had big plans for recipes I wanted to share with you. First there was Chana Masala (which I promise will appear shortly) then there were pickled carrots followed by blackberry scones, and the recipe for which I was most excited were creamsicle cupcakes topped with creamy chocolate frosting. The unfortunate (for you and me) part of these plans is that none of the previously mentioned recipes turned out well enough to justify sharing.
I spend a lot of time daydreaming about opening my own bakery and what that will be like. Then I inevitably go through a streak where nothing I make turns out right and I begin to question my authority to make such a move. I mean, who is going to come to a bakery that serves cupcakes which disintigrate into a pile of crumbs as soon as the paper is removed? Or scones that look like they got baked in a wind tunnel?! I certainly wouldn't and can hardly expect others to.

Fortunately I seem to be in someone's good graces and eventually stumble upon a recipe that puts a halt to the downward spiral. My redemption this time came on a grey, rainy, stay-at-home kind of Saturday morning. Actually it started late Friday night when I pulled out a long forgotten pastry book and scanned it's pages for a glimmer of inspiration. I have had this book for years but had pretty much written it off after a disasterously failed attempt at pain au levain which gobbled up not mere hours but DAYS of my time and eager expectations, and resulted in an extremely dense frisbee-like blob of dough. That said, I am of the belief that most things in life are worth a second chance, and considered it my due dilligence to give this book another go round. I am certainly glad I did.
When it comes to breakfast pastries I tend to head down a one track road. If I happen to wake up early on a weekend day I usually feel compelled to hurry downstairs and create something to pop into the oven and fill the house with happy, warm, weekend morning smells. The pastry of choice more often than not is of the scone variety. However, in the spirit of branching out and conquering new frontiers I admonished myself to take the plunge and make something that perhaps I had not thought before to eat for breakfast. It was then that a picture of a bing cherry cobbler caught my eye. With a crusty biscuit top and ruby colored stains sliding down the ramekin where burbling juice sneaked out of the cobbler, it was too much to resist.

Because I live in the middle of the country where it is still early spring (meaning the only local thing to eat is dirt and a few token sprigs of asparagus) I knew I was going to have to doctor up this recipe. Due to the fact that I didn't just happen to have 2# of bing cherries lying around the house it was time to get creative. I rumaged through the freezer and unearthed a glorious bag of little frozen apples from an old orchard nearby, carefully cored and sliced by my mom last fall. In the search for juicier fruit to pair with said apples I also managed to find a handful of frozen blackberries and a few more handfuls of frozen raspberries. Added to that was a squeeze of fresh lemon juice, a few tablespoons of diced crystallized ginger for good measure, and a cobbled top of buttermilk biscuit dough; breakfast was in the oven (as my grandmother would say) in a jiffy.

As I savored each bite of supple crimson-stained fruit paired with bits of crunchy cinnamon scented biscuit and washed them down with a swig of good dark coffee it dawned on me that perhaps cobblers were indeed meant to be eaten for breakfast. Really there seems to be no better way to start the day than sitting down to a bowl full of fruit and biscuits, a cup of something hot, and a little time just to be.
Bake. Eat. Repeat.

A modified version of Bing Cherry Cobbler from Williams-Sonoma Essentials of Baking
Filling:
2 1/2 cups (1 lb) cored, sliced, peeled semi-tart apples
2 1/2 cups (1 lb) fresh or frozen blackberries and/or raspberries
1 Tbsp. fresh lemon juice
3 Tbsp. sugar3 Tbsp. diced crystallized ginger
I am of the persuasion that this crumble would adapt well to most any combination of fruit you happen to have on hand. Rhubarb/berry, apple/pear, peach and/or peach/berry, etc. Let your imagination go wild and feel free to adjust/add/omit spices as you see fit.
Biscuit topping:
2/3 cup buttermilk
1 tsp. vanilla extract1 1/2 cups all purpose flour
1/3 cup sugar
1 tsp. baking powder1/2 tsp. baking soda
1/2 tsp. salt
1/2 tsp. ground cinnamon
6 Tbsp. cold unsalted butter, cut into 1/2-inch piecesPreheat oven to 375 and place a rack in the middle position. For individual servings, place six 1-cup ramekins or custard cups on a half sheet pan. For a large cobbler, have ready a 9-inch glass or ceramic pie dish or baking dish with sides at least 2 3/4 inches high.
To make the filling, in a large bowl, stir together the fruit, lemon juice, sugar, and ginger until well mixed. Divide fruit among the ramekins or pour into baking dish. Bake the fruit for 10 minutes while you prepare the topping.
To make the topping, in a small bowl, stir together the buttermilk and vanilla and set aside. In a medium bowl whisk together the flour, baking powder, baking soda, salt, sugar, and cinnamon. Using a pastry blender or 2 knives, cut in the butter until the mixture forms large coarse crumbs, the size of small peas. Pour the buttermilk mixture over the flour mixture and, using a large wooden spoon, stir just until combined and a soft, sticky, evenly moistened dough forms.
Drop the dough by heaping spoonfuls onto the hot fruit, spacing it evenly over the surface. The topping will not cover the fruit but will spread during baking. Sprinkle with cinnamon-sugar mixture evenly over the dough.
Bake until the fruit filling is bubbling, the topping is browned, and a toothpick inserted into the topping comes out clean, 30-35 minutes (mine took more like 45 minutes on account of using frozen fruit). Transfer to a wire rack and let cool 15 minutes. Serve warm or at room temperature.
This cobbler is good eaten on it's own, though I've also been told it is exceptionally tasty served with a splash of milk or dollop of creme fraiche, if you are so inclined.
Thursday, April 22, 2010
Pita, Pita, pumpkin eatah

When one lives in New York City she tends to lose sight of reality and begins to take all kinds of things 'city life' for granted. Take for instance that no further than a stone's throw from my former apartment I could find any sort of ethnic food a person could hope for. Multiple restaurants for each ethnicity, at that! I recall being awed the first year I lived in Brooklyn and I hastily took advantage of expanding the horizon of my taste buds. Thai from the little place around the corner tonight, a saunter down the block to the burrito place tomorrow, and who knows what's in store for the weekend?! Indian? Spanish? Italian?!
The problem lies in returning to small town America. No longer am I able to wander out my front door and walk aimlessly down the street until I spy the cuisine that strikes my fancy. Sure, there are a few ethnic destinations to be had here, but they are few and far between and not a stone's throw from my door.


I prowled the internet for successful sounding recipes and decided on one posted to Epicurious that was flecked with whole wheat and supported with many cook's comments of success. The only trick to this recipe is that it requires a bit of forethought so that you have plenty of time for making a sponge, mixing, and proofing the dough. The great idea for this meal didn't hit me until late afternoon, so we ended up enjoying our pita by starlight, but really where's the fault in that? In fact, I can attest that pita bread can be enjoyed any time of day, particularly at breakfast toasted, split, and filled with peanut butter and banana. Throw in a cup of Earl Grey tea and you've got the breakfast of champions!


Whole Wheat Pita Bread
Gourmet May 2003
Yield: Makes 8 (6-inch) pita loaves
1 (1/4-ounce) package active dry yeast (2 1/2 teaspoons)
1 teaspoon honey
1 1/4 cups warm water (105–115°F)2 cups bread flour or high-gluten flour, plus additional for kneading
1 cup whole-wheat flour
1/4 cup extra-virgin olive oil
1 teaspoon salt
Cornmeal for sprinkling baking sheets*
Stir together yeast, honey, and 1/2 cup warm water in a large bowl, then let stand until foamy, about 5 minutes. (If mixture doesn't foam, discard and start over with new yeast.)
While yeast mixture stands, stir together flours in another bowl. Whisk 1/2 cup flour mixture into yeast mixture until smooth, then cover with plastic wrap and let stand in a draft-free place at warm room temperature until doubled in bulk and bubbly, about 45 minutes. Stir in oil, salt, remaining 3/4 cup warm water, and remaining 2 1/2 cups flour mixture until a dough forms.
Turn out dough onto a floured surface and knead, working in just enough additional flour to keep dough from sticking, until dough is smooth and elastic, 8 to 10 minutes**. Form dough into a ball and put in an oiled large bowl, turning to coat. Cover bowl with plastic wrap and let dough rise in draft-free place at warm room temperature until doubled in bulk, about 1 hour.
Punch down dough and cut into 8 pieces. Form each piece into a ball. Flatten 1 ball, then roll out into a 6 1/2- to 7-inch round on floured surface with a floured rolling pin. Transfer round to 1 of 2 baking sheets lightly sprinkled with cornmeal. Make 7 more rounds in same manner, arranging them on baking sheets. Loosely cover pitas with 2 clean kitchen towels (not terry cloth) and let stand at room temperature 30 minutes.
Transfer 4 pitas, 1 at a time, directly onto oven rack***. Bake until just puffed and pale golden, about 2 minutes. Turn over with tongs and bake 1 minute more. Cool pitas on a cooling rack 2 minutes, then stack and wrap loosely in a kitchen towel to keep pitas warm. Bake remaining 4 pitas in same manner. Serve warm.
Pitas can be baked 1 week ahead and cooled completely, then frozen, wrapped well in foil in a sealed plastic bag. Thaw before reheating, wrapped in foil, 10 to 12 minutes in a 350°F oven.
* I used the cornmeal as prescribed, but found by the time I was baking the last of my pitas the stray cornmeal on my baking sheet had charred, leaving the pita embedded with little black specks. Next time I think I will try dusting the sheet trays on which the pita rest with flour instead.
**I kneaded my dough in the Kitchenaid instead of by hand. I found it necessary to add a few handfuls of flour after mixing for a minute or two to gain the right consistancy. You want the dough to be soft and moist, but it should also be pulled away from the bowl, reaching out from the dough hook to smack the bowl on occasion.
Subscribe to:
Comments (Atom)